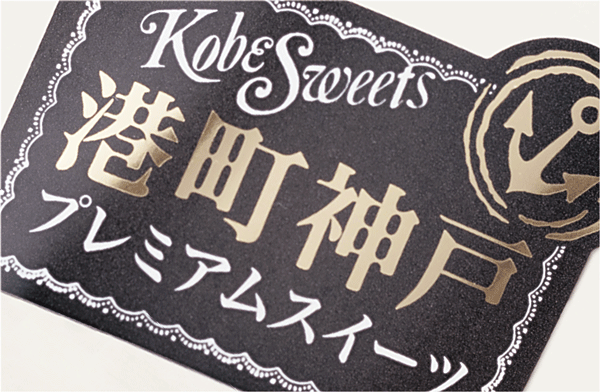
Foil Stamping Effect

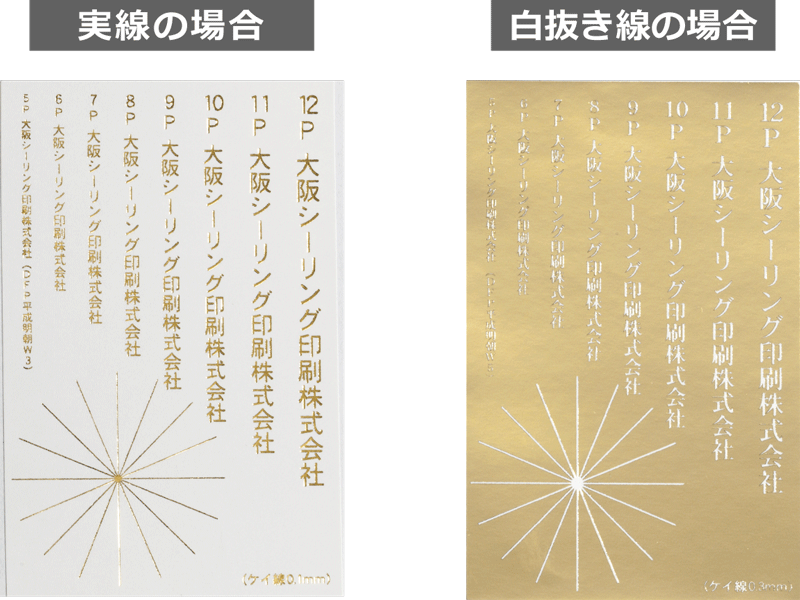
・Since there is a possibility that the line may become thin or blurred, a solid line of 0.1 mm or more and a punched line of 0.2 mm or more is required. (refer to the following)
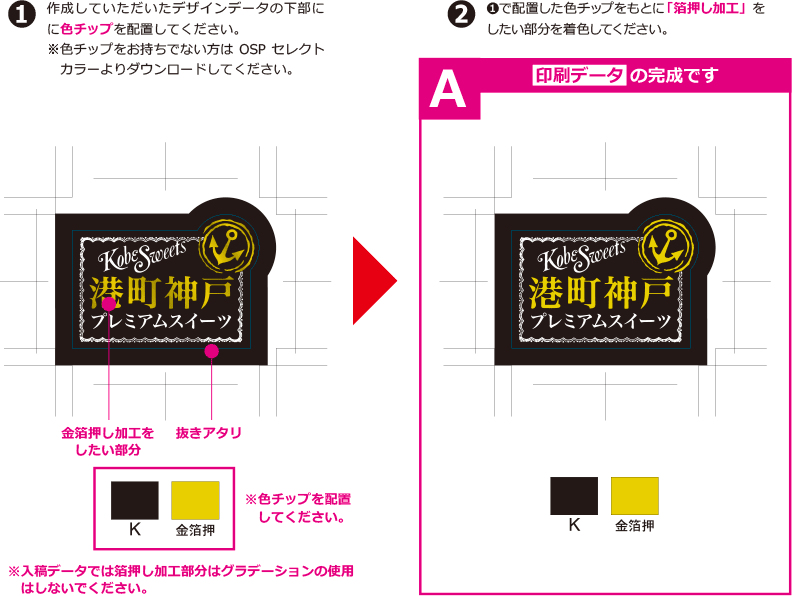
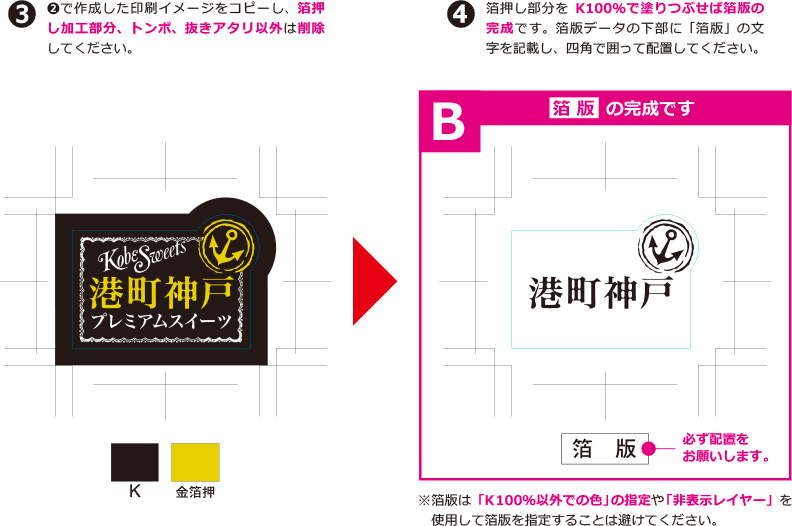
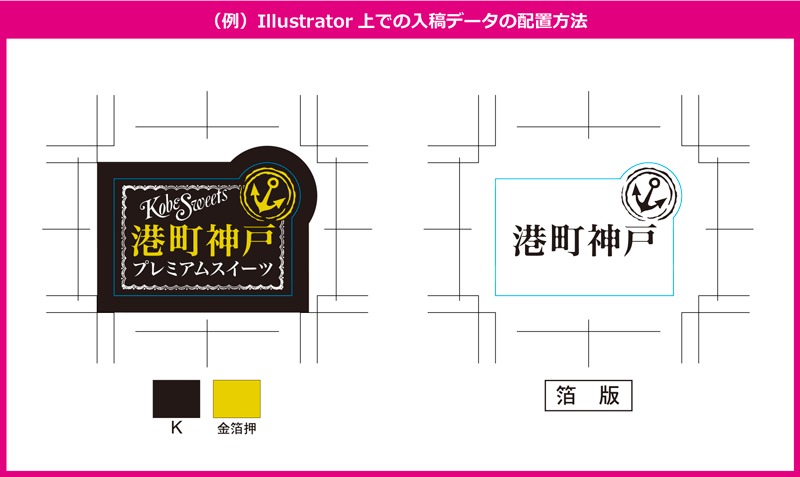
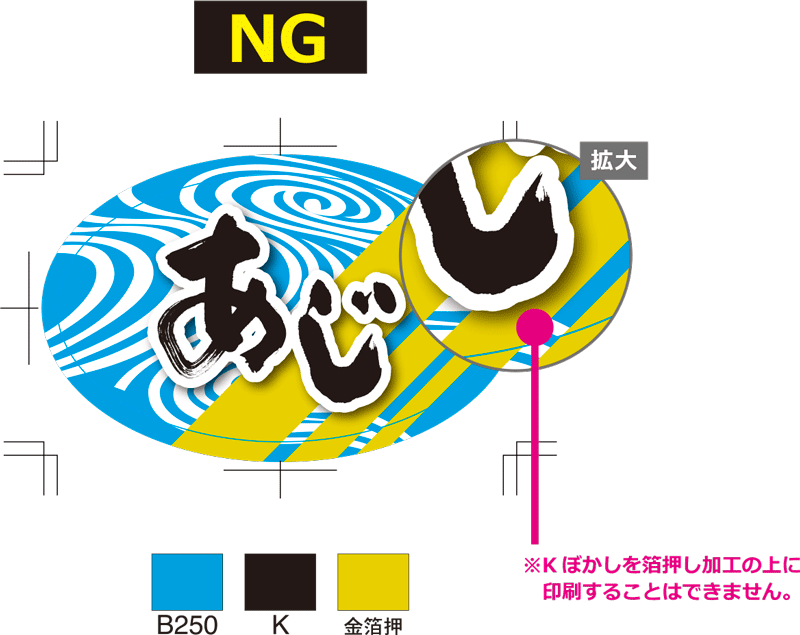
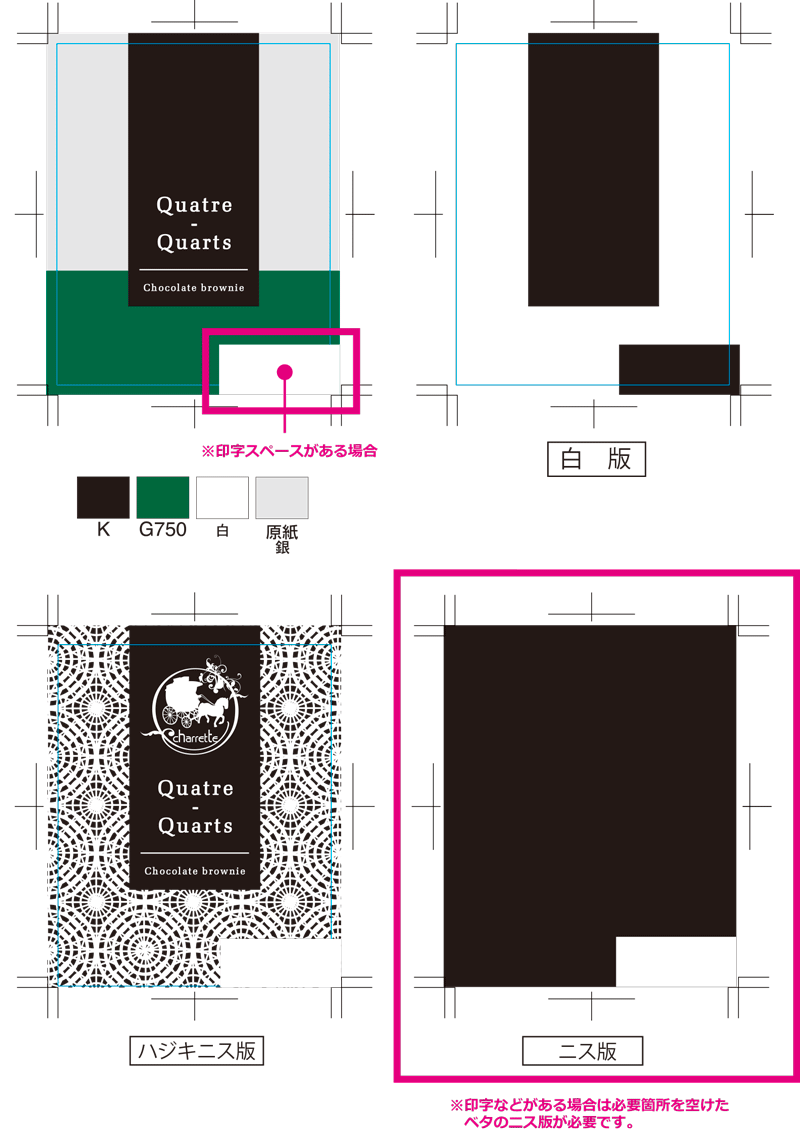
-Foil Stamping Effect is done after printing, so it is not possible to print on top of Foil Stamping Effect. (refer to the following)
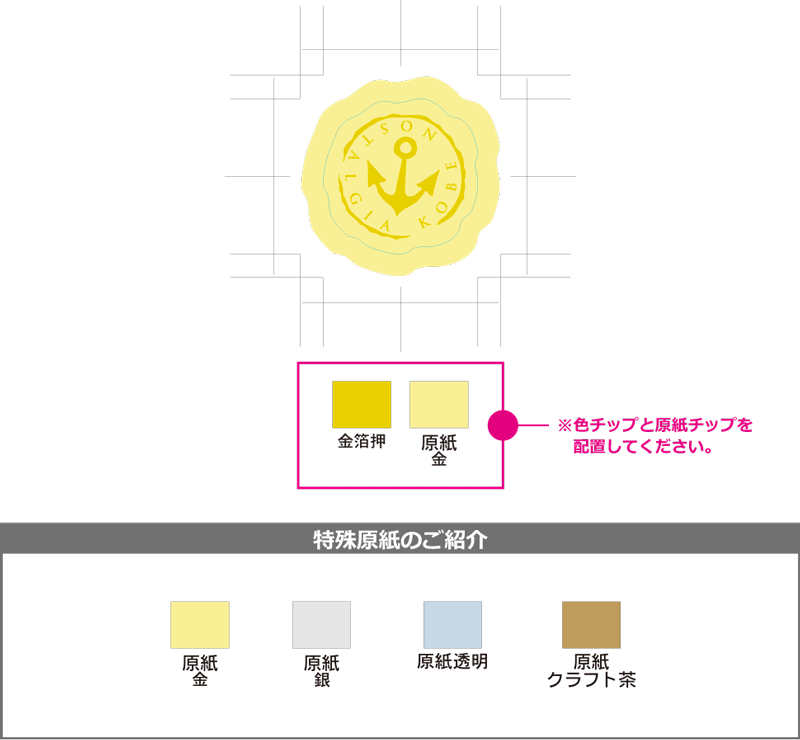
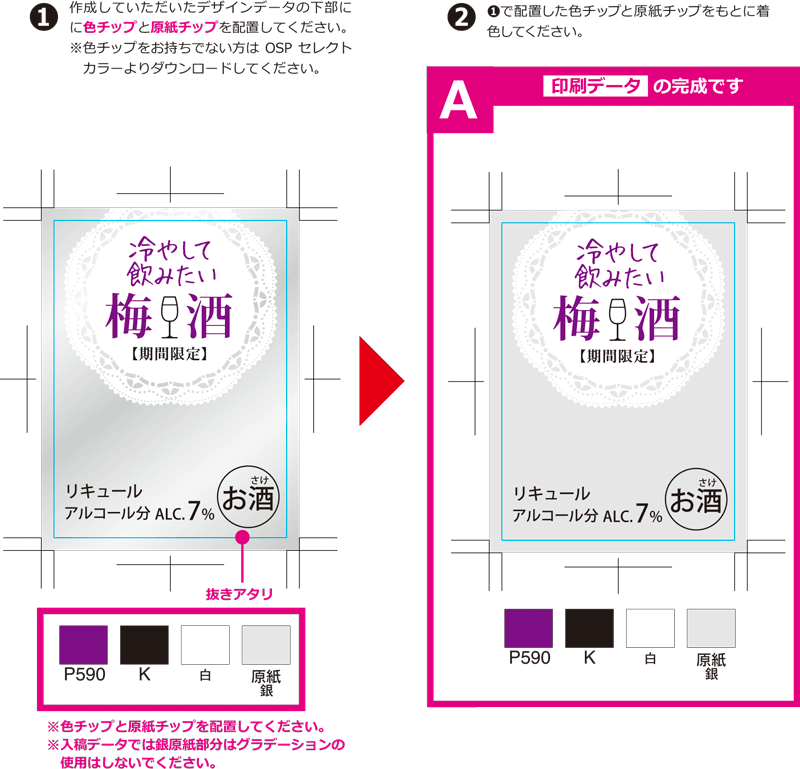
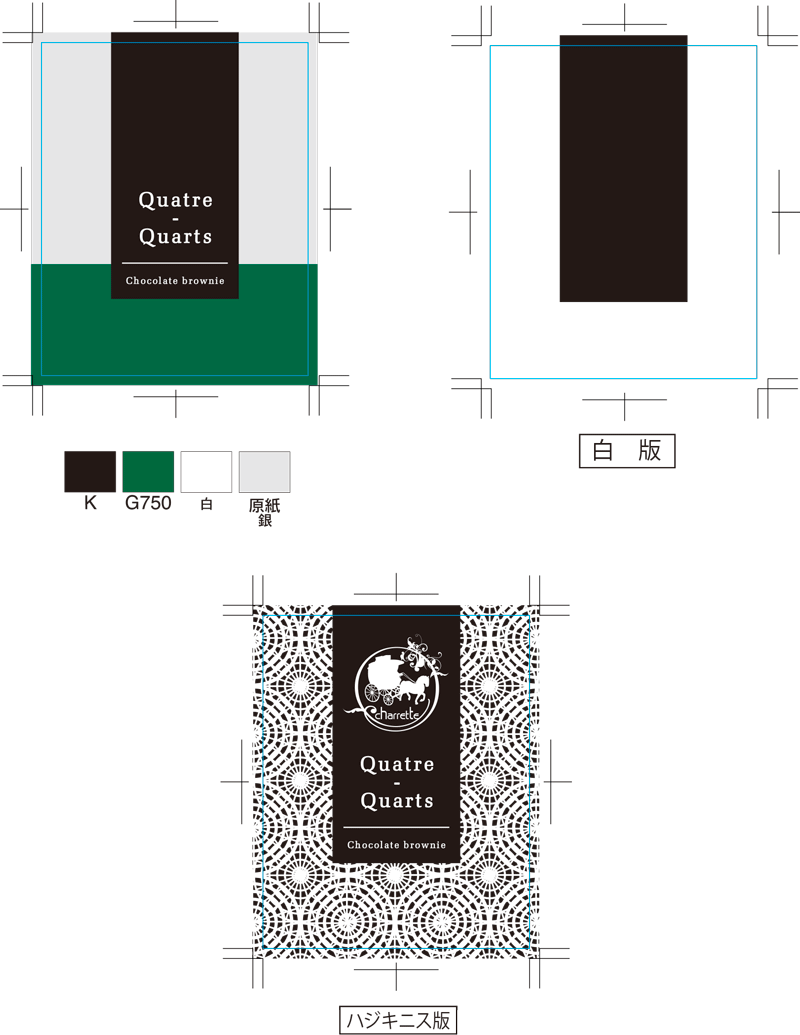
・When Foil Stamping Effect the base paper below, please place the base paper chip in addition to the color chip. (refer to the following)
This data allows you to know for sure which colors are compatible.
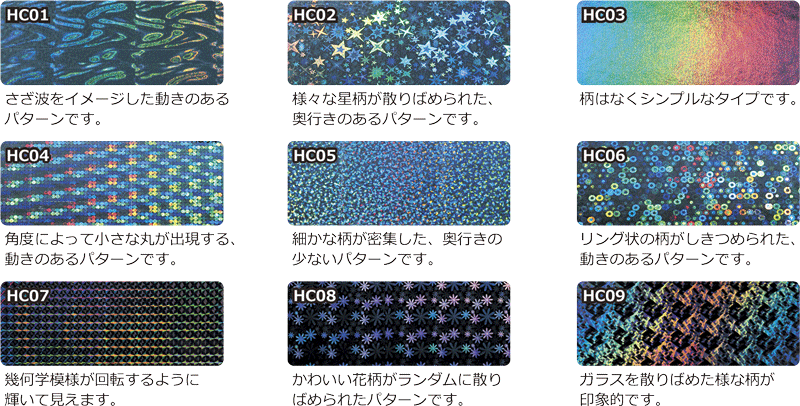
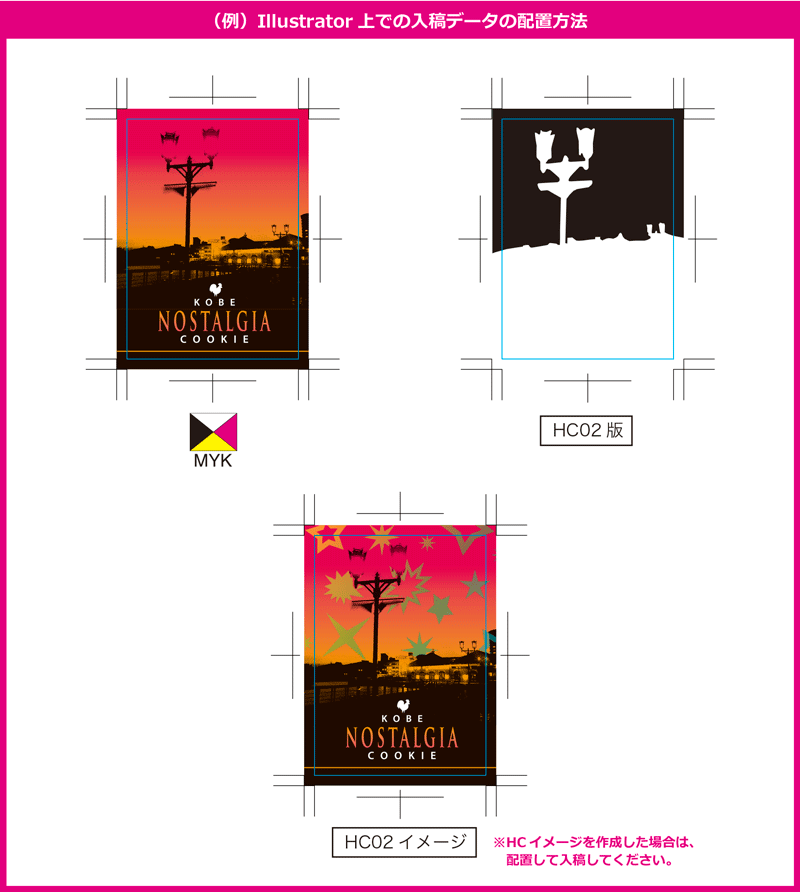
HC (hologram coat) processing

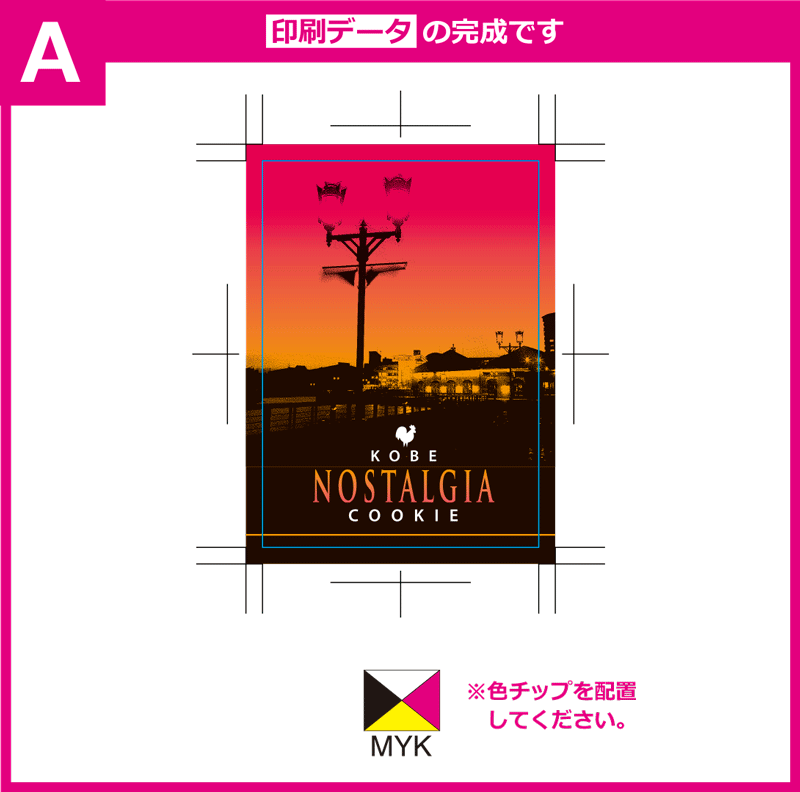
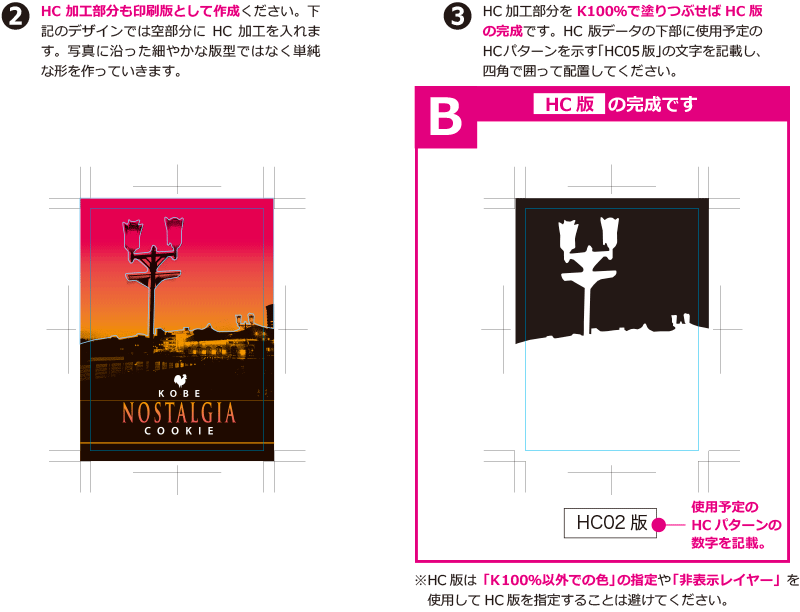
Even more plus! About “HC Image”
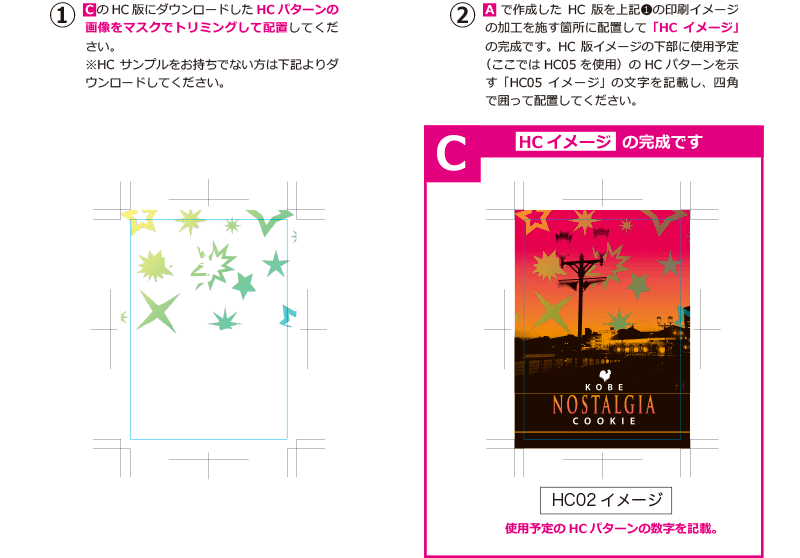
*If you have created an additional HC image, please place it near the design data and HC version.

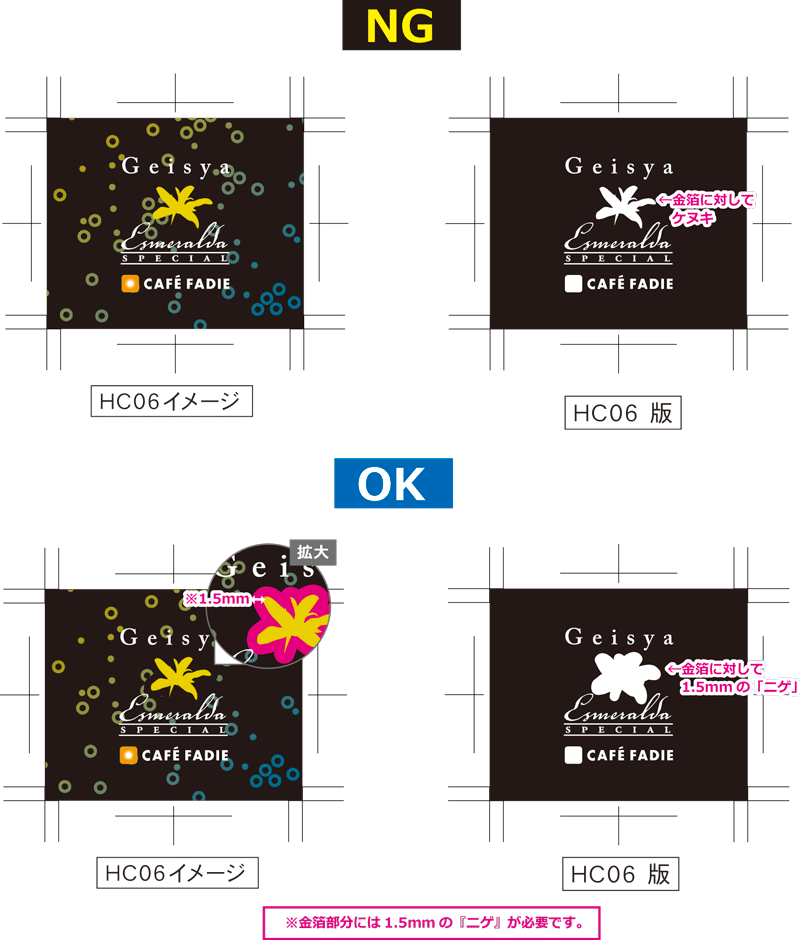
・ If there is a gold leaf part in the design using HC, the HC version cannot be created with Kenuki. Please refer to the following and make a 1.5mm strip from the gold leaf part. (refer to the following)
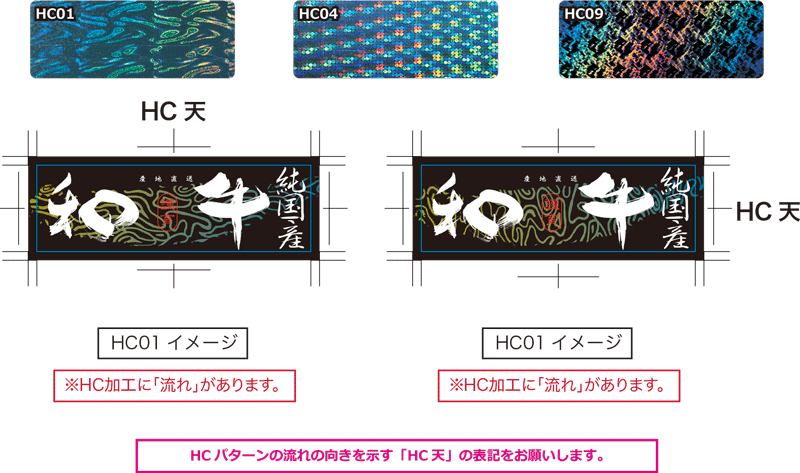
・“HC01”, “HC04” and “HC09” have a pattern flow. (There is a notation that there is a "flow" in HC processing)
Please place the HC sky letters attached to the downloaded data so that you can understand the printing process.
・The processing area for HC (hologram coat) is up to 150mm wide.
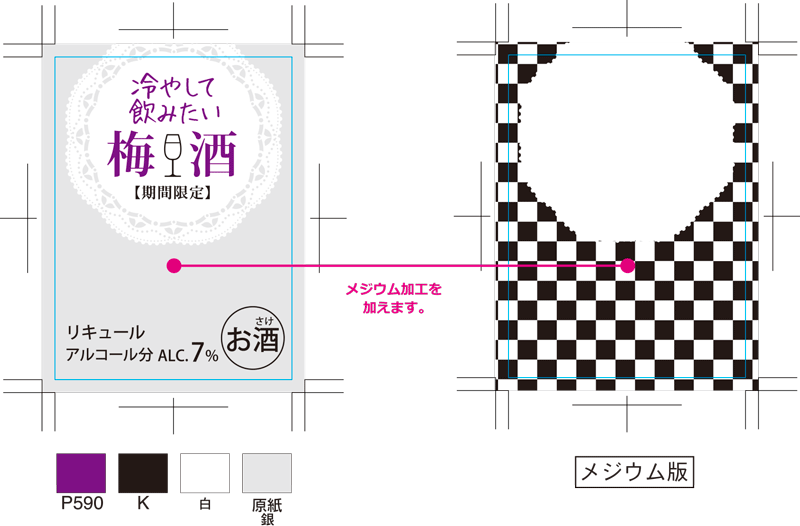
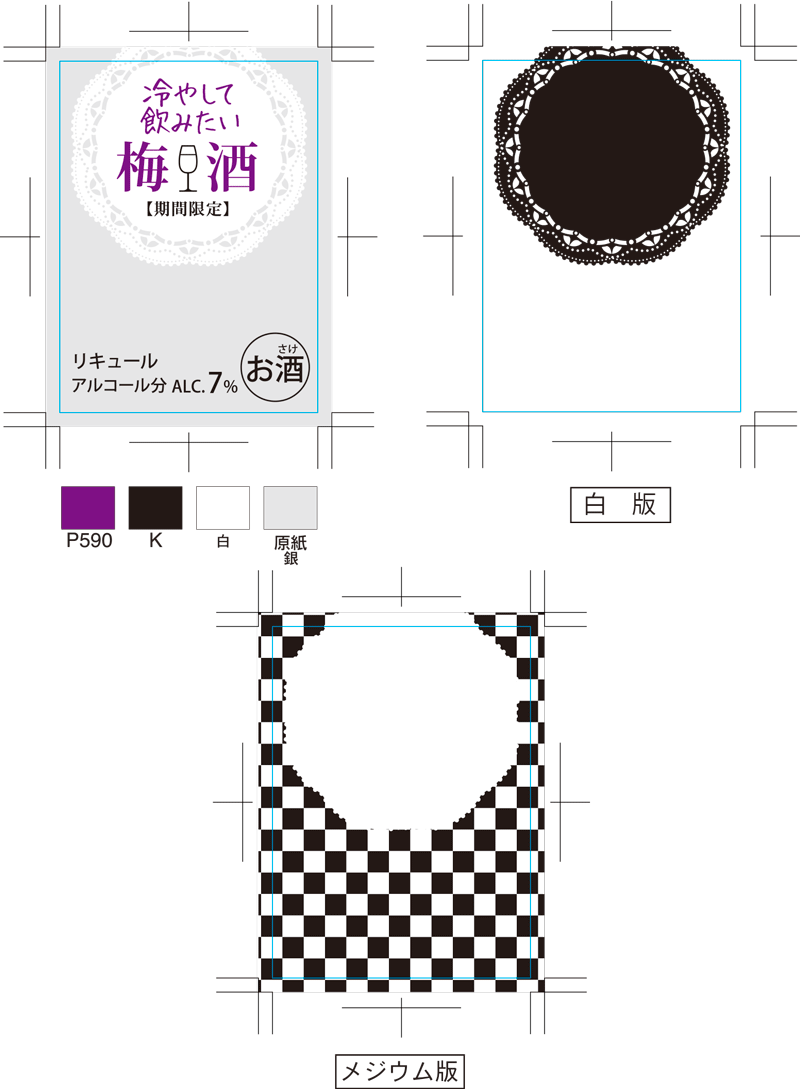
Medium processing
We will explain how to create the data.
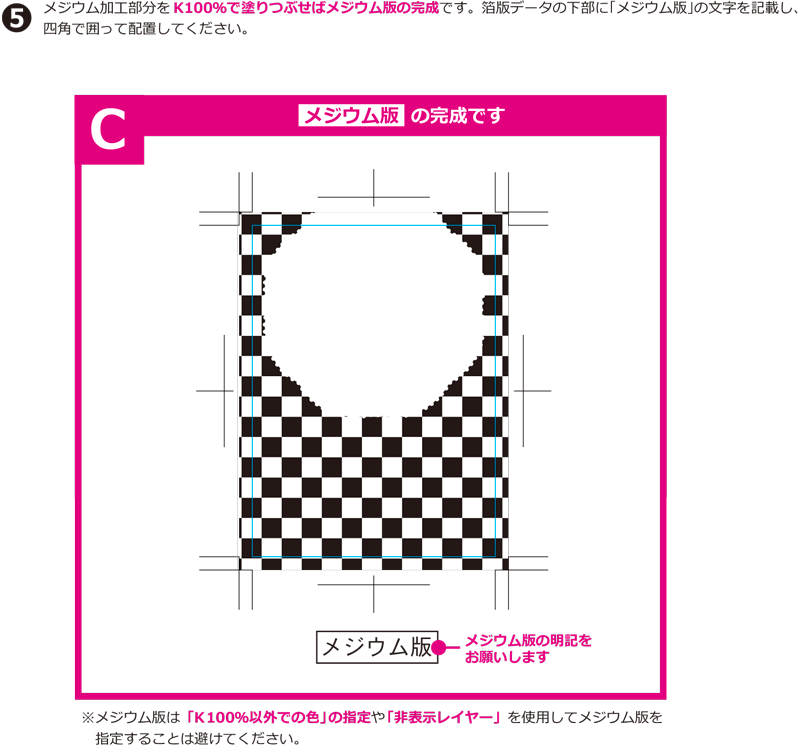


- ・Please make sure that there are no mistakes in the corresponding locations.
- - We recommend paper with a glossy surface. (Transparent PET, gold gloss, silver gloss, etc.)
- - Convex ring printing is possible in up to 5 colors. (medium + 5 colors)
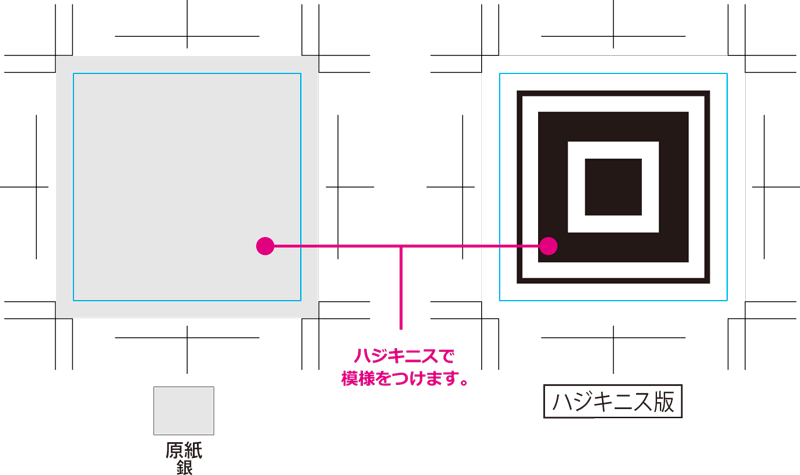
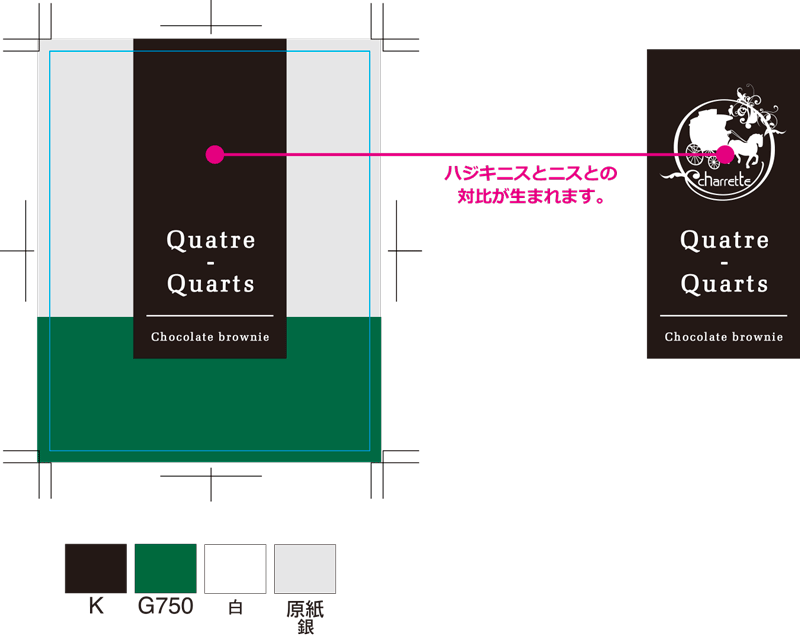
Hadjikinis processing
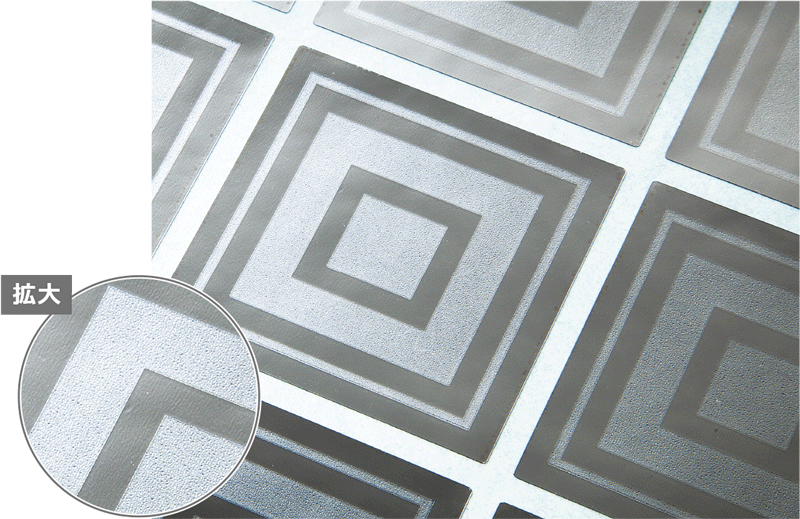


We will explain how to create the data.

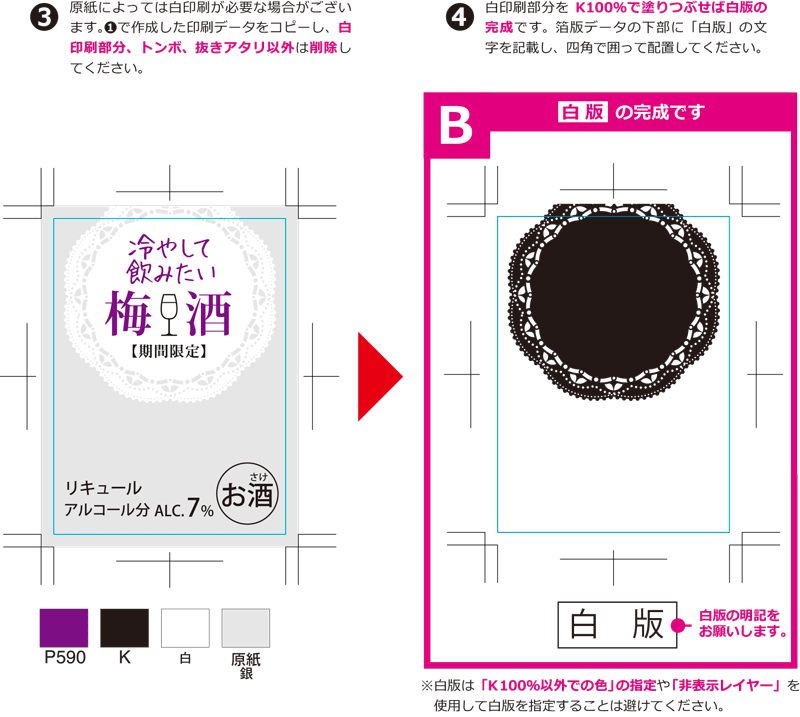
- After applying Hajikinis, apply gloss varnish to the entire surface. Due to the reaction between the varnishes, the varnish version changes into a varnish-repelled version (grainy). Basically, the varnished version will be used on the entire surface. If there is printing, etc., please create a solid varnished version of the submitted data in Illustrator with the necessary spaces removed, referring to the following.
- ・Please make sure that there are no mistakes in the corresponding locations.
- - We recommend paper with a glossy surface. (Coated paper, transparent PET, gold gloss, silver gloss, etc.)
- ・Effective on dark/dark colors.
- ・You can only use up to 4 colors. (varnish + varnish + 4 colors)
- For designs such as CMYK colors + white + varnish + hard varnish, it is necessary to reduce the number of process colors by one color.
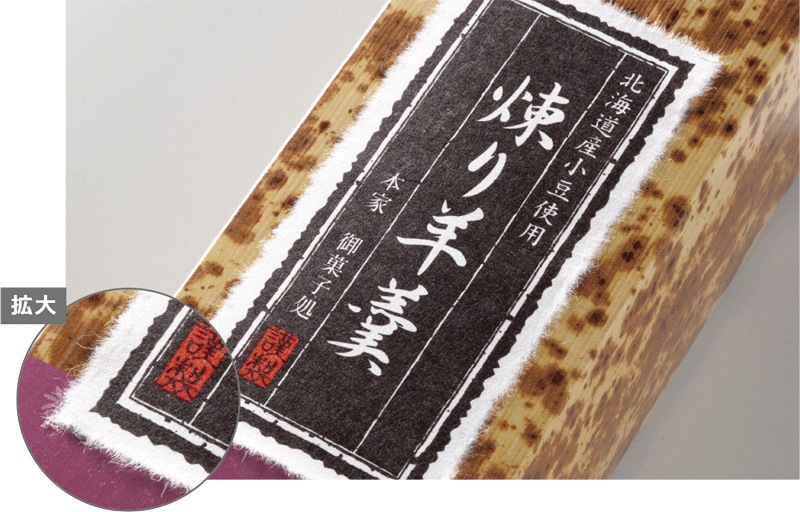
Chigiri Washi Effect
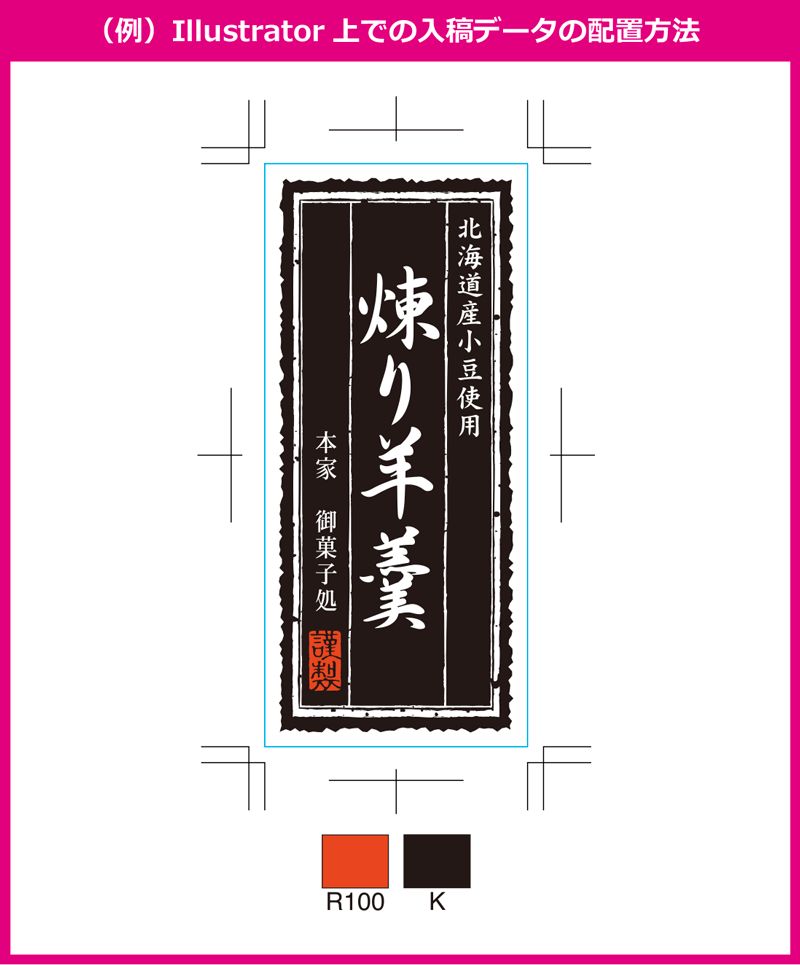
*If you do not have a color chip, please download it from OSP Select Color.
- Please also note the following points regarding the characteristics of Japanese paper printing.
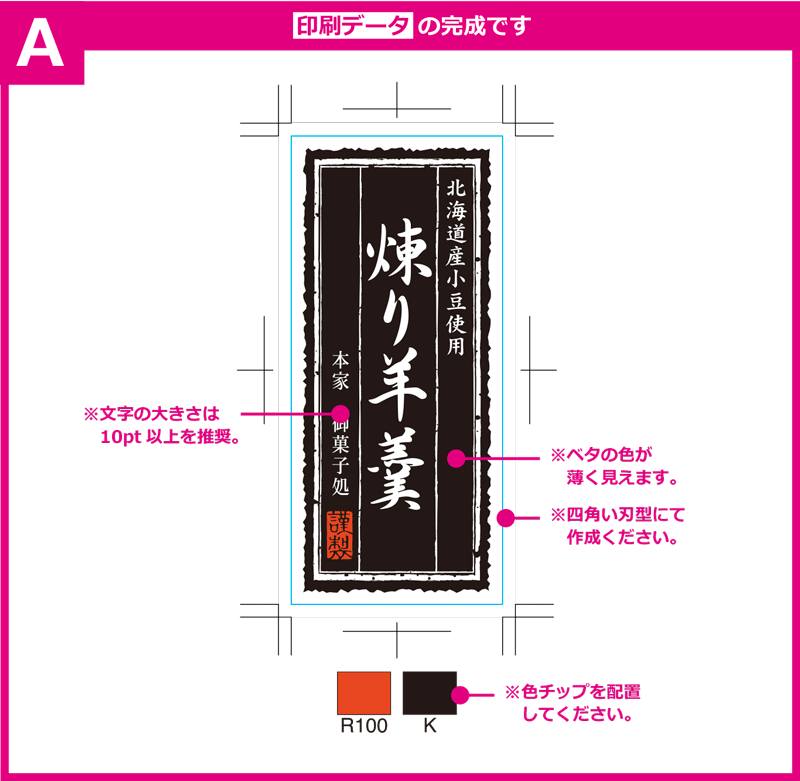
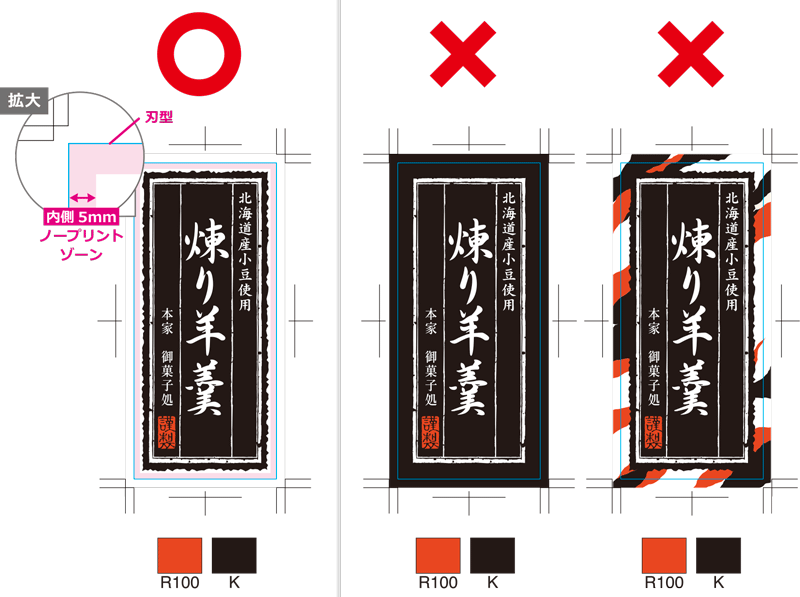
- ❶ Please use a square blade shape (see below for size). There is no need to create a torn shape.
- ❷ The solid color may look lighter to some extent depending on the paper material.
- ❸ Barcodes cannot be used as they may be poorly read due to bleeding, etc.
- ❹We recommend a font size of 10pt or more.
- ❺ The settings of the Ami version are not reproducible.
| size | Width 50mm~150mm × Feed 50mm~150mm |
| printing method | Convex rotary flexographic printing (offset rotary printing is also possible) |
| Number of colors | Up to 6 colors can be printed using offset rotary printing. |
| Convex rotary flexo can print up to 3 special colors | |
| Processing | Can be used for stamping gold, silver, colored foil, special foil, etc. (see note 3) |
| font size | 10pt or more recommended (small text may be blurred due to blurring) |
| JAN use | Barcodes cannot be used. |
- Foil Stamping Effect can be added to Chigiri Washi Effect. However, there are size standards for Foil Stamping Effect, so please refer to the table below.
- For more information on Foil Stamping Effect, please see Foil Stamping Effect page below.
| 11 types of width direction | 50 | 55 | 60 | 70 | 80 | 90 | 100 | 110 | 120 | 140 | 150 |
| 7 types of feeding directions | 50 | --- | 60 | 70 | --- | --- | 100 | 110 | --- | 140 | 150 |