CMYK (color) edition
Let's take a look at the process of creating CMYK (color) label data.
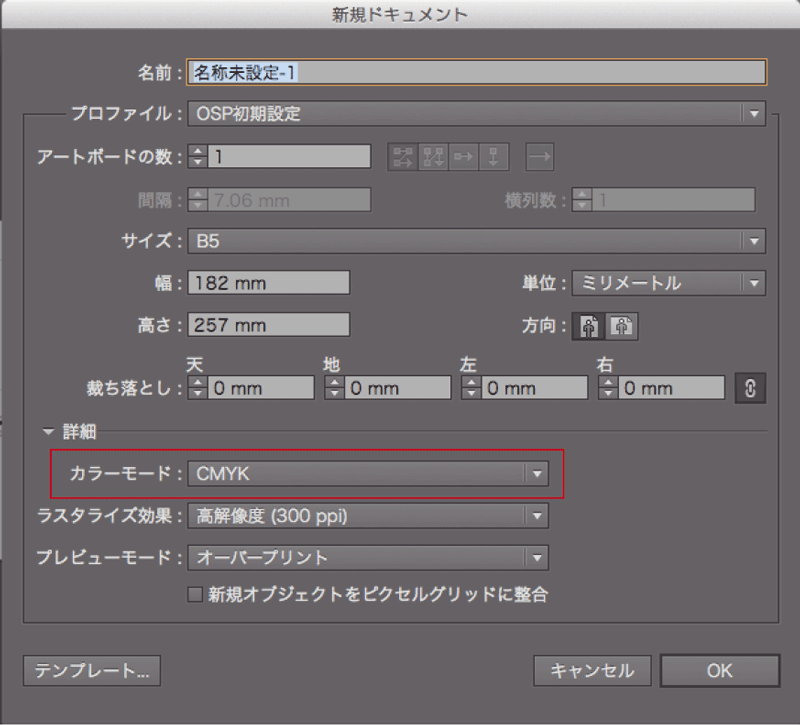
Create a new document
Create a new document.
At this time, be sure to use "CMYK" as the color mode.
At this time, be sure to use "CMYK" as the color mode.
make a blade shape
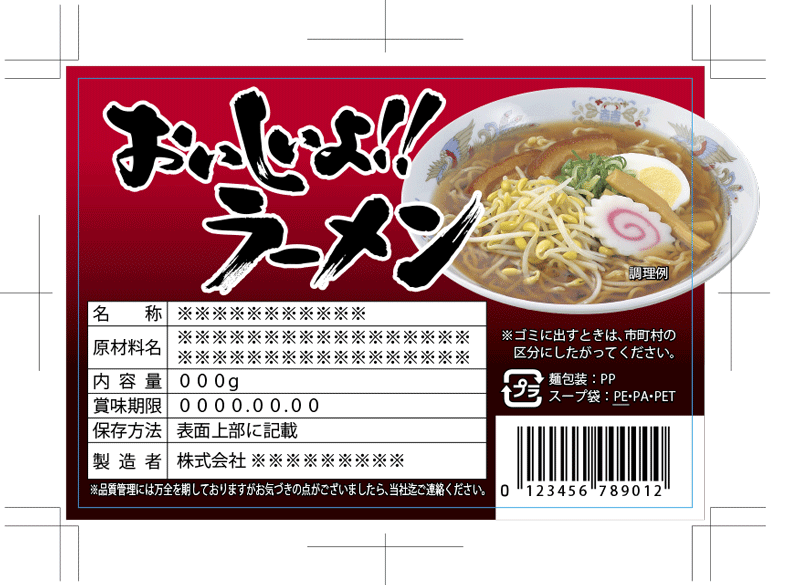
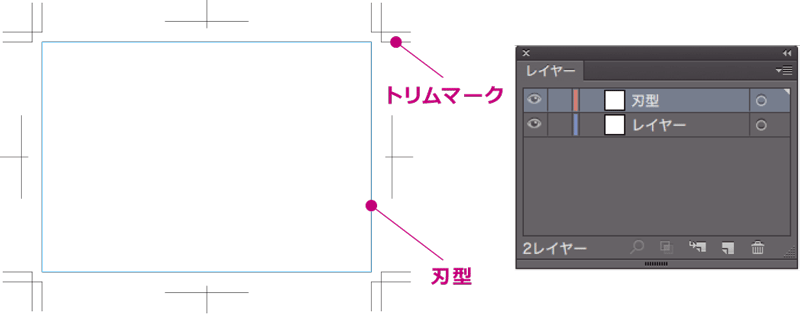
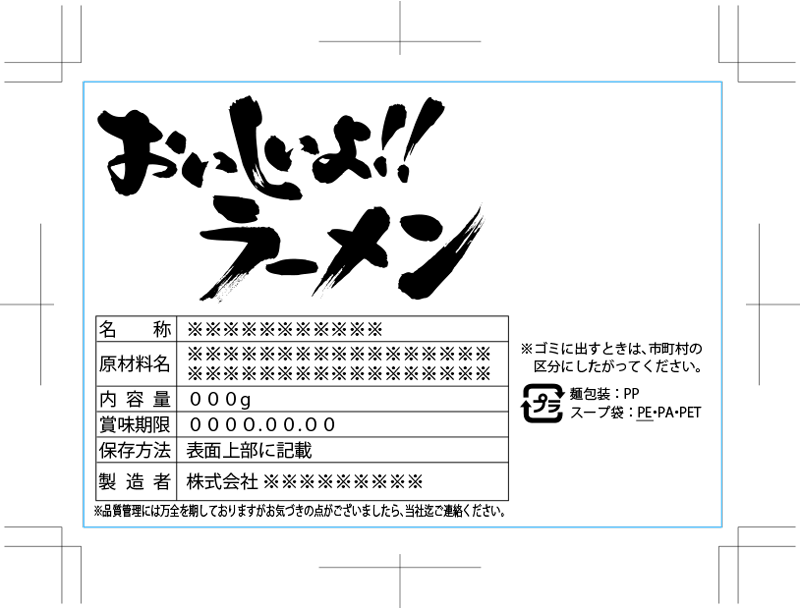
Create a border to indicate the finished shape. This shape becomes the blade shape that cuts out the paper.
The size is the actual size, and the unit is mm.
Prepare a layer specifically for the blade shape, and create a border line and trim marks for it.
OSP offers basic blade shapes (square, square, circle) in 5mm and 10mm increments.
If you use a 5mm pitch size, you can print more quickly.
The size is the actual size, and the unit is mm.
Prepare a layer specifically for the blade shape, and create a border line and trim marks for it.
OSP offers basic blade shapes (square, square, circle) in 5mm and 10mm increments.
If you use a 5mm pitch size, you can print more quickly.
Place characters, lines, and marks
Place the necessary characters, lines, marks, etc.
For food labels, the number of points for characters and the size of marks are determined. For more information, please see "About Display/Marks". We also provide data for various marks that can be used as is, so please feel free to use them.
For food labels, the number of points for characters and the size of marks are determined. For more information, please see "About Display/Marks". We also provide data for various marks that can be used as is, so please feel free to use them.
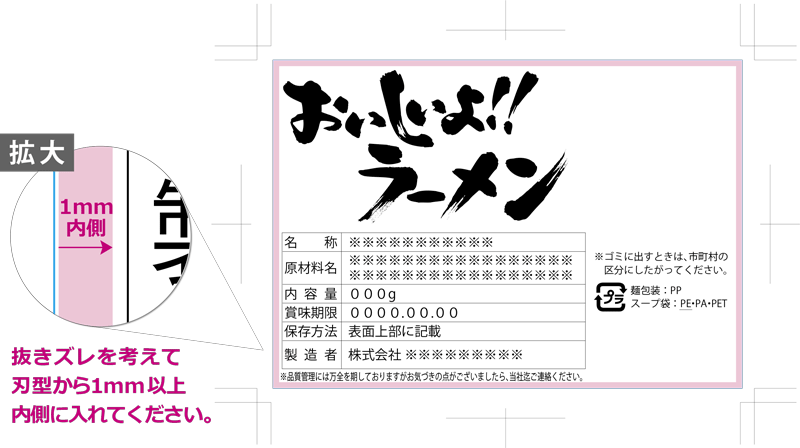
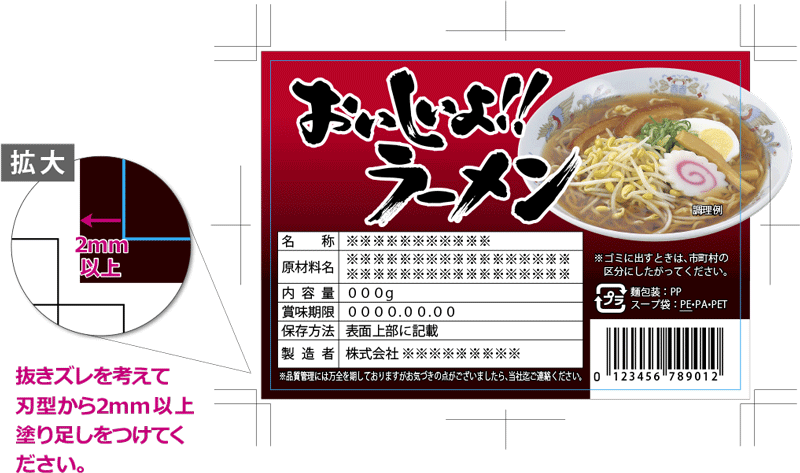
Regarding removal misalignment
For letters and designs that should not be cut, please place them at least 1mm inside the blade mold to avoid the possibility of misalignment.
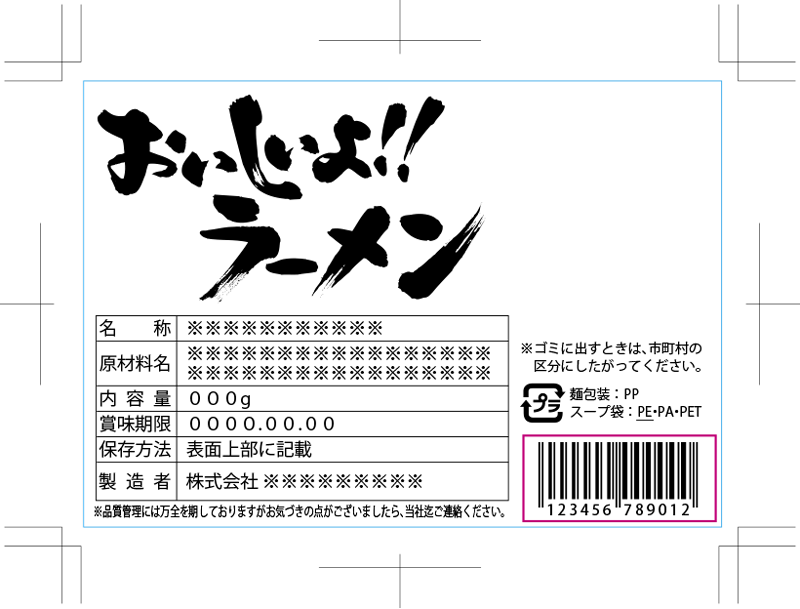
Place the barcode
Place the barcode. To prevent barcodes from being read incorrectly, OSP printing standards We have decided. If you wish to proceed outside of the standard due to size, please inform our sales representative accordingly.
If you do not have barcode creation software, we will create one for you using OSP.
Download dummy barcode Please do so and enter it into your data. After submission, we will create a barcode using OSP.
If you do not have barcode creation software, we will create one for you using OSP.
Download dummy barcode Please do so and enter it into your data. After submission, we will create a barcode using OSP.
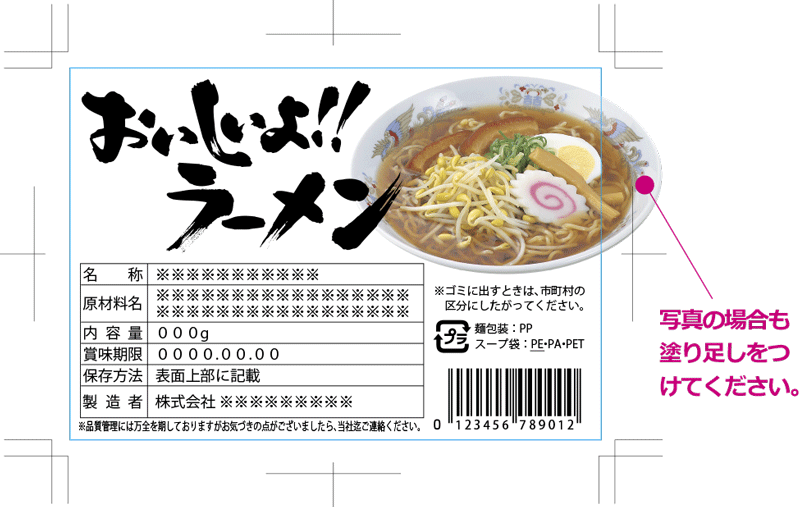
Place the photo
Place the cut out photo. Please use CMYK color mode.
It is possible to print beautifully if the resolution is 300ppi or higher.
If you do not mind proceeding at a low resolution of 200ppi or less, please let our sales representative know.
Also, if you use a photo, please leave the part that protrudes from the blade mold.
It is possible to print beautifully if the resolution is 300ppi or higher.
If you do not mind proceeding at a low resolution of 200ppi or less, please let our sales representative know.
Also, if you use a photo, please leave the part that protrudes from the blade mold.
add background
Add color to the background. There is a possibility that "cutting misalignment" may occur when cutting out with the blade die, so please add at least 2mm more filler.
When inserting a gradation, there is a limit to the ami%. For more information, please see the "About gradation rules" page.
When inserting a gradation, there is a limit to the ami%. For more information, please see the "About gradation rules" page.
Save data
Please save data created with Illustrator as an Illustrator file. We can handle files created in any version, so there is no need to lower the version and save.
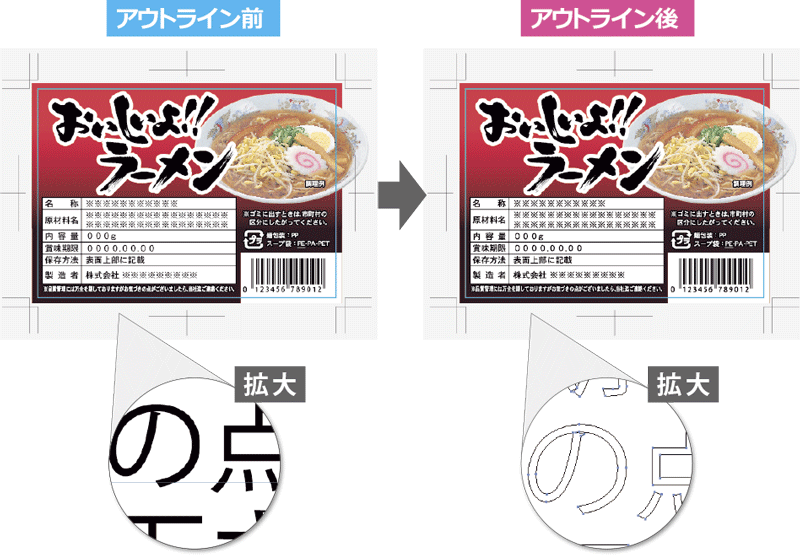
Please be sure to convert text into outlines for submission. However, once the text has been converted to an outline, it cannot be restored, so please keep the pre-outline data in case you want to edit it later.
Please be sure to convert text into outlines for submission. However, once the text has been converted to an outline, it cannot be restored, so please keep the pre-outline data in case you want to edit it later.
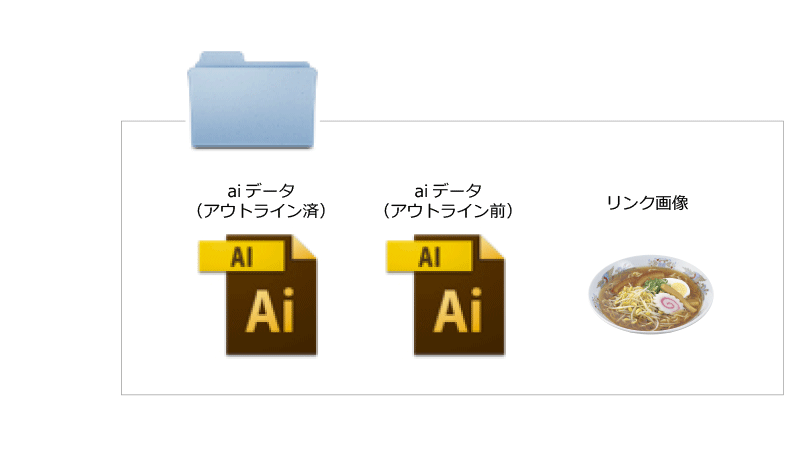
Please put all the saved data in one folder and give it to your sales representative.
[Data to be submitted]
[ 1 ] Outlined AI data (for submission)
[ 2 ] AI data before outline (for re-editing)
[ 3 ] Link image
[Data to be submitted]
[ 1 ] Outlined AI data (for submission)
[ 2 ] AI data before outline (for re-editing)
[ 3 ] Link image