Special features
Let's take a look at the process of creating spot color label data.
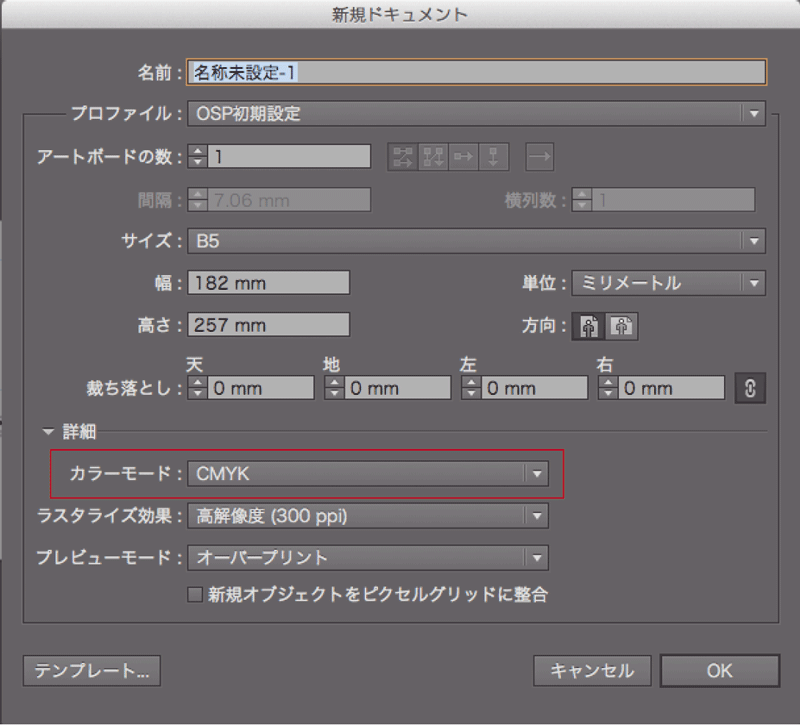
Create a new document
Create a new document.
At this time, be sure to use "CMYK" as the color mode.
At this time, be sure to use "CMYK" as the color mode.
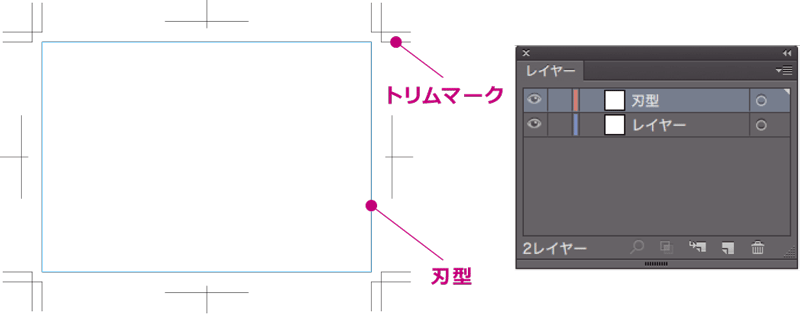
make a blade shape
Create a border to indicate the finished shape. This shape becomes the blade shape that cuts out the paper.
The size is the actual size, and the unit is mm.
Prepare a layer specifically for the blade shape, and create a border line and trim marks for it.
OSP offers basic blade shapes (square, square, circle) in 5mm and 10mm increments.
If you use a 5mm pitch size, you can print more quickly.
The size is the actual size, and the unit is mm.
Prepare a layer specifically for the blade shape, and create a border line and trim marks for it.
OSP offers basic blade shapes (square, square, circle) in 5mm and 10mm increments.
If you use a 5mm pitch size, you can print more quickly.
give special instructions
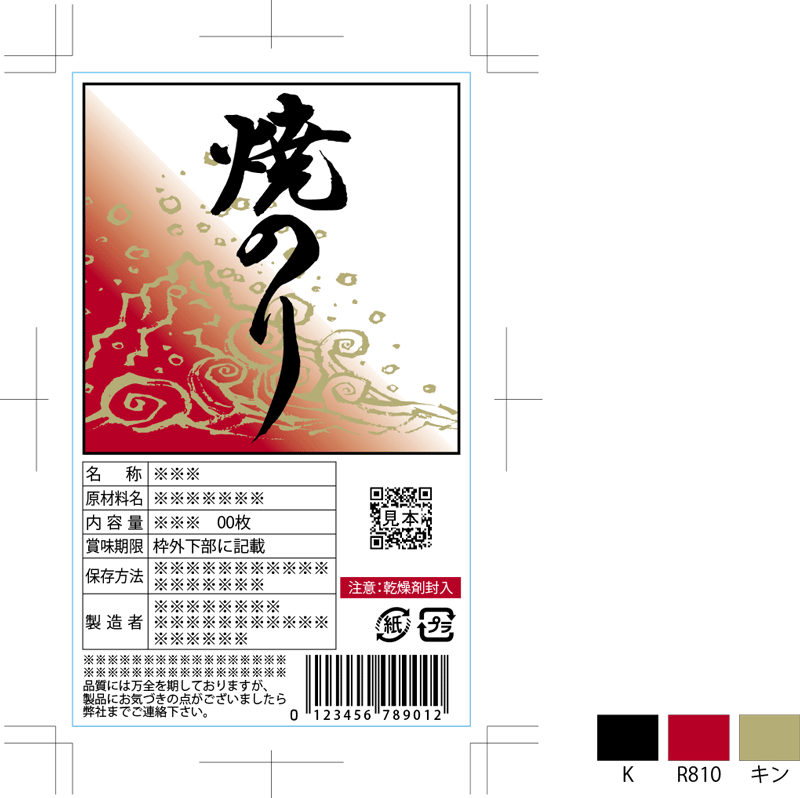
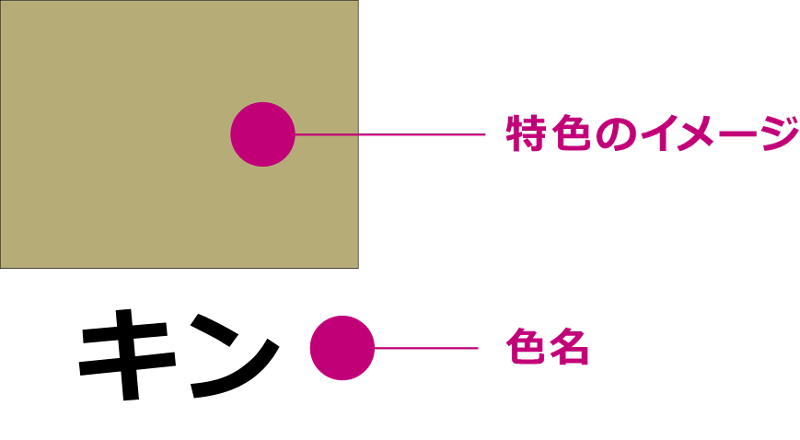
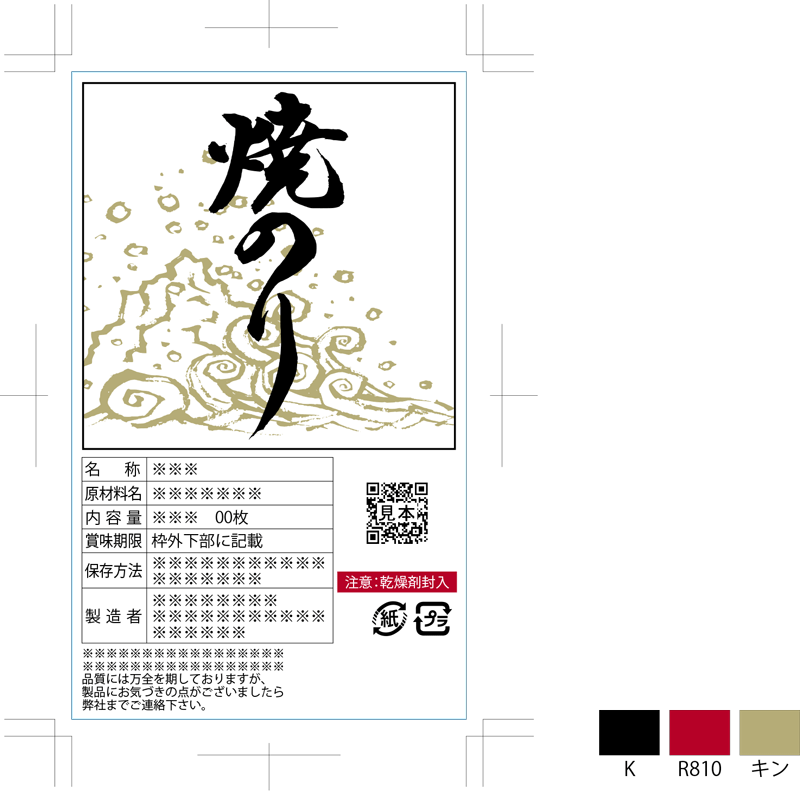
Please place the color instructions, which are a set of color and color name, near the design data.
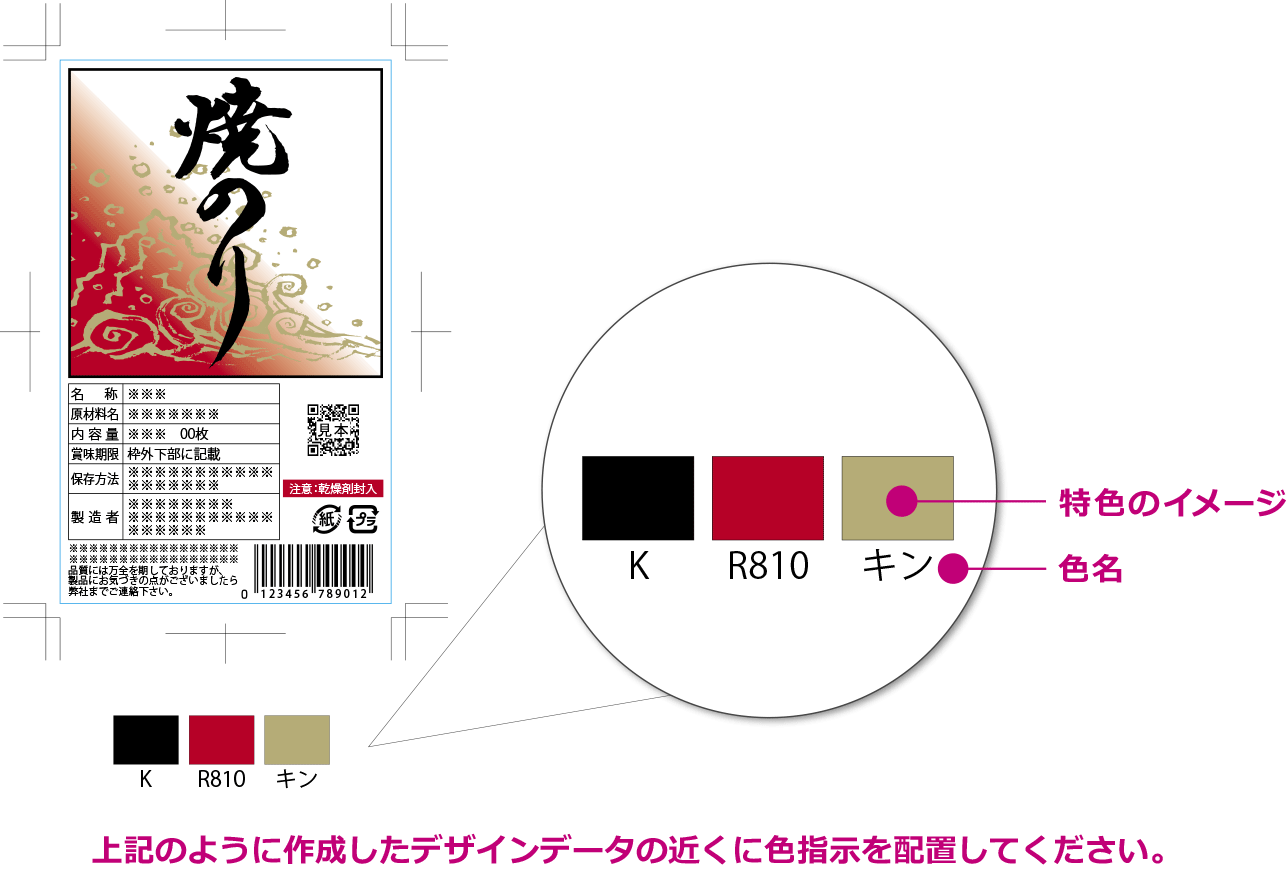
Create an image color of the spot color you want to print using a swatch.
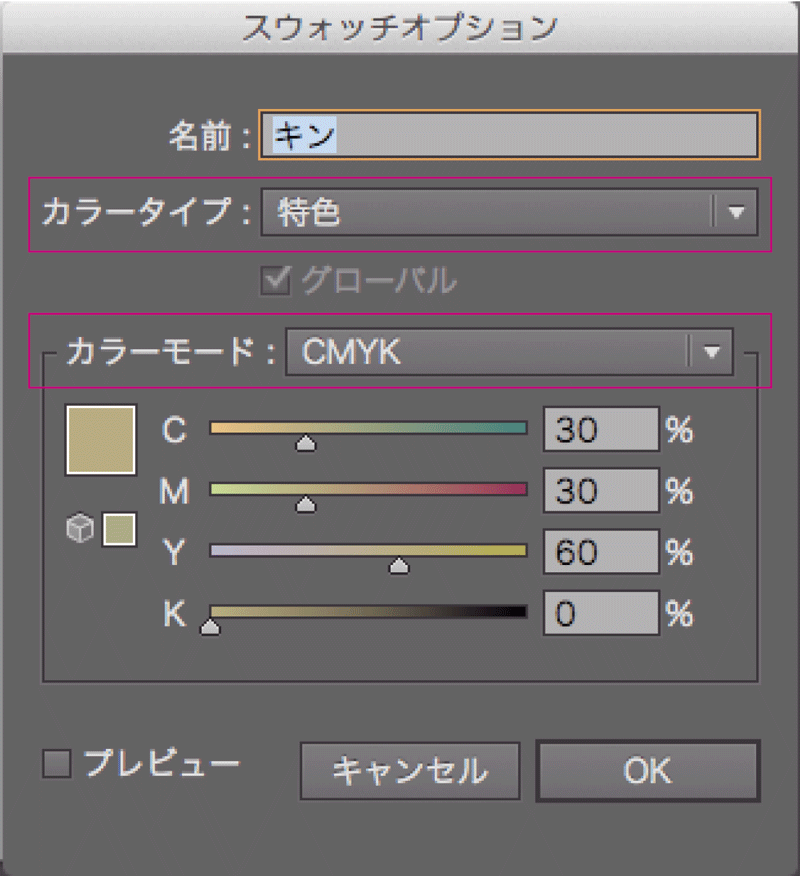
Set the color type to spot color, set the color mode to CMYK, and register the image color of the spot color.
Set the color type to spot color, set the color mode to CMYK, and register the image color of the spot color.
You can download OSP feature data. Copying the color instructions into your design will save you the trouble of registering them with swatches. Please use all means.
Place characters, lines, and marks
Place the necessary characters, lines, marks, etc.
For food labels, the number of points for characters and the size of marks are determined. For more information, please see "About Display/Marks". We also provide data for various marks that can be used as is, so please feel free to use them.
For food labels, the number of points for characters and the size of marks are determined. For more information, please see "About Display/Marks". We also provide data for various marks that can be used as is, so please feel free to use them.
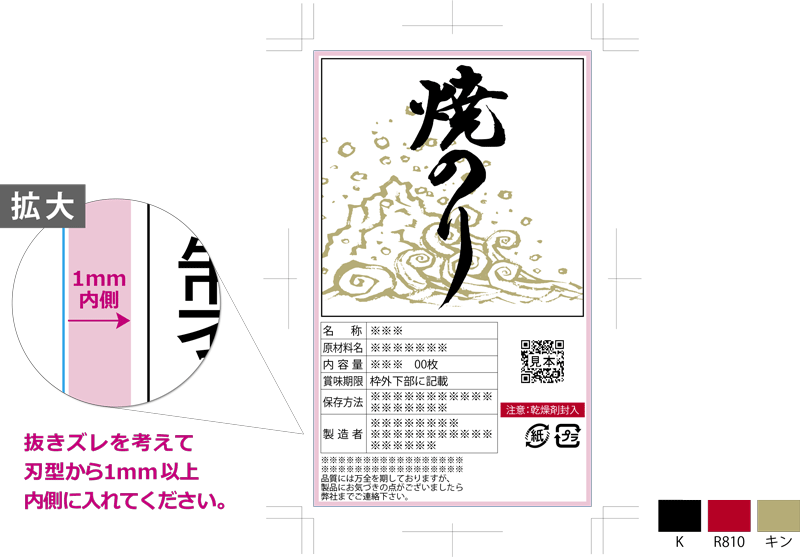
Regarding removal misalignment
For letters and designs that should not be cut, please place them at least 1mm inside the blade mold to avoid the possibility of misalignment.
Place the barcode
Place the barcode. To prevent barcode reading errors, OSP has established printing standards. If you wish to proceed outside of the standard due to size, please inform our sales representative accordingly.
If you do not have barcode creation software, we will create one for you using OSP. (Proceeding without proofreading is also possible) Download the dummy barcode and insert it into the data. After submission, we will create a barcode using OSP.
If you do not have barcode creation software, we will create one for you using OSP. (Proceeding without proofreading is also possible) Download the dummy barcode and insert it into the data. After submission, we will create a barcode using OSP.
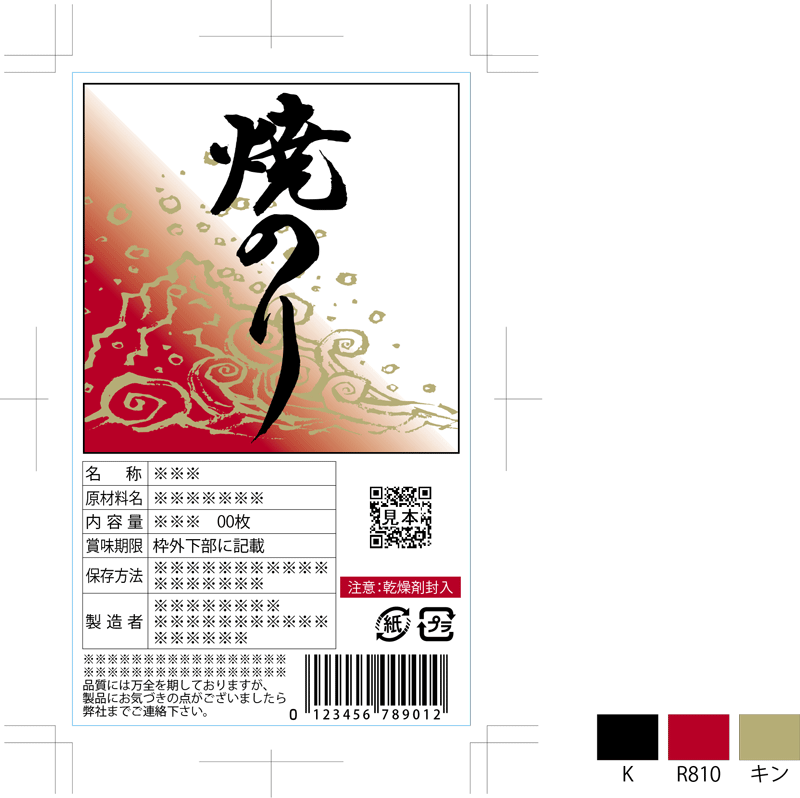
add background
Add color to the background. When inserting a gradation, there is a limit to the ami%. For more information, please see the "Using gradients" page.
Save data
Please save data created with Illustrator as an Illustrator file. We will accept any version you create, so there is no need to lower the version and save it.
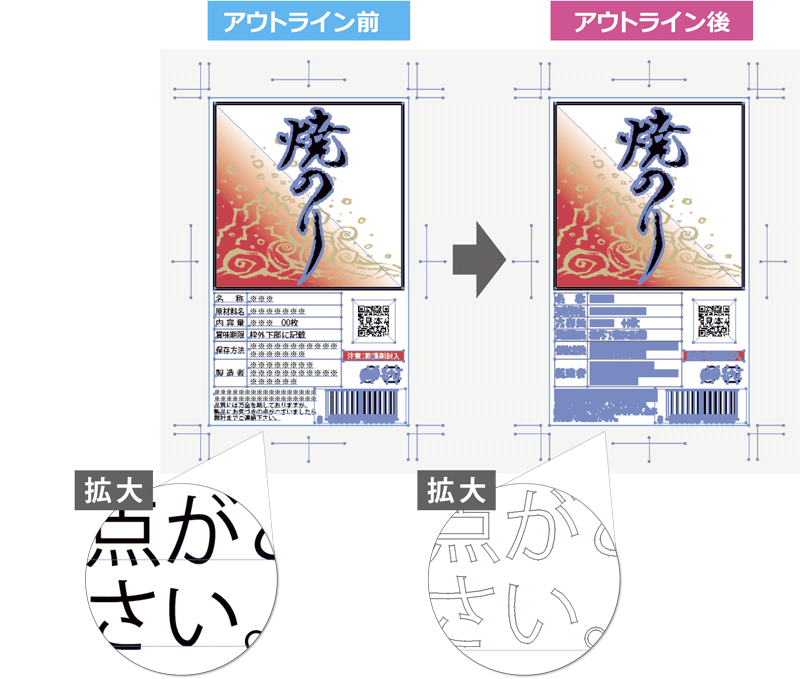
Please be sure to convert text into outlines for submission. However, once the text has been converted to an outline, it cannot be restored, so please keep the pre-outline data in case you want to edit it later.
Please be sure to convert text into outlines for submission. However, once the text has been converted to an outline, it cannot be restored, so please keep the pre-outline data in case you want to edit it later.
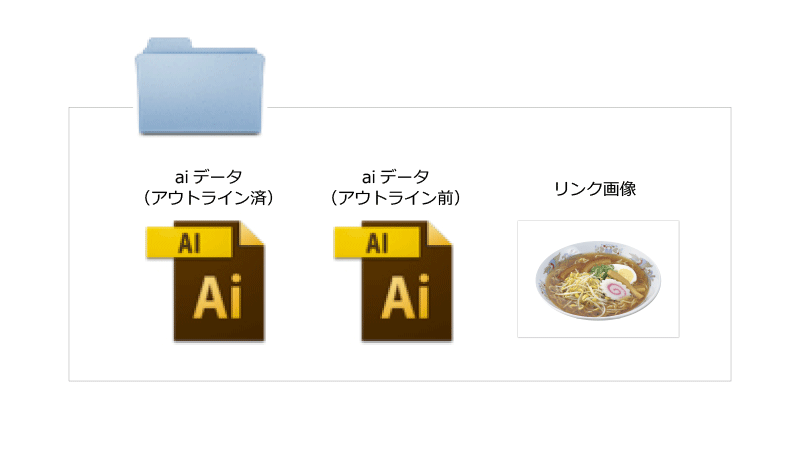
Please put all the saved data in one folder and give it to your sales representative.
[Data to be submitted]
[ 1 ] Outlined AI data (for submission)
[ 2 ] AI data before outline (for re-editing)
[ 3 ] Link image
[Data to be submitted]
[ 1 ] Outlined AI data (for submission)
[ 2 ] AI data before outline (for re-editing)
[ 3 ] Link image